openwrt上面克隆git仓库

问题与背景

为了进一步升级openwrt的能力范畴,很多服务又没有docker镜像, 所以只能在wrt上面跑代码,这样就涉及到了git克隆仓库,但是openwrt默认的ssh client是dropbear 的实现方式,这是一个针对小内存设备的特别版本,使用 git clone git@github.com:amanoooo/amanosblog.git 就会报错

现象

1
2
3
4
5
6
7
root@amanoswrt:~/amano# git clone git@github.com:amanoooo/amanosblog.git
Cloning into 'amanosblog'...
Connection closed by 20.205.243.166 port 22
fatal: Could not read from remote repository.

Please make sure you have the correct access rights
and the repository exists.

解决

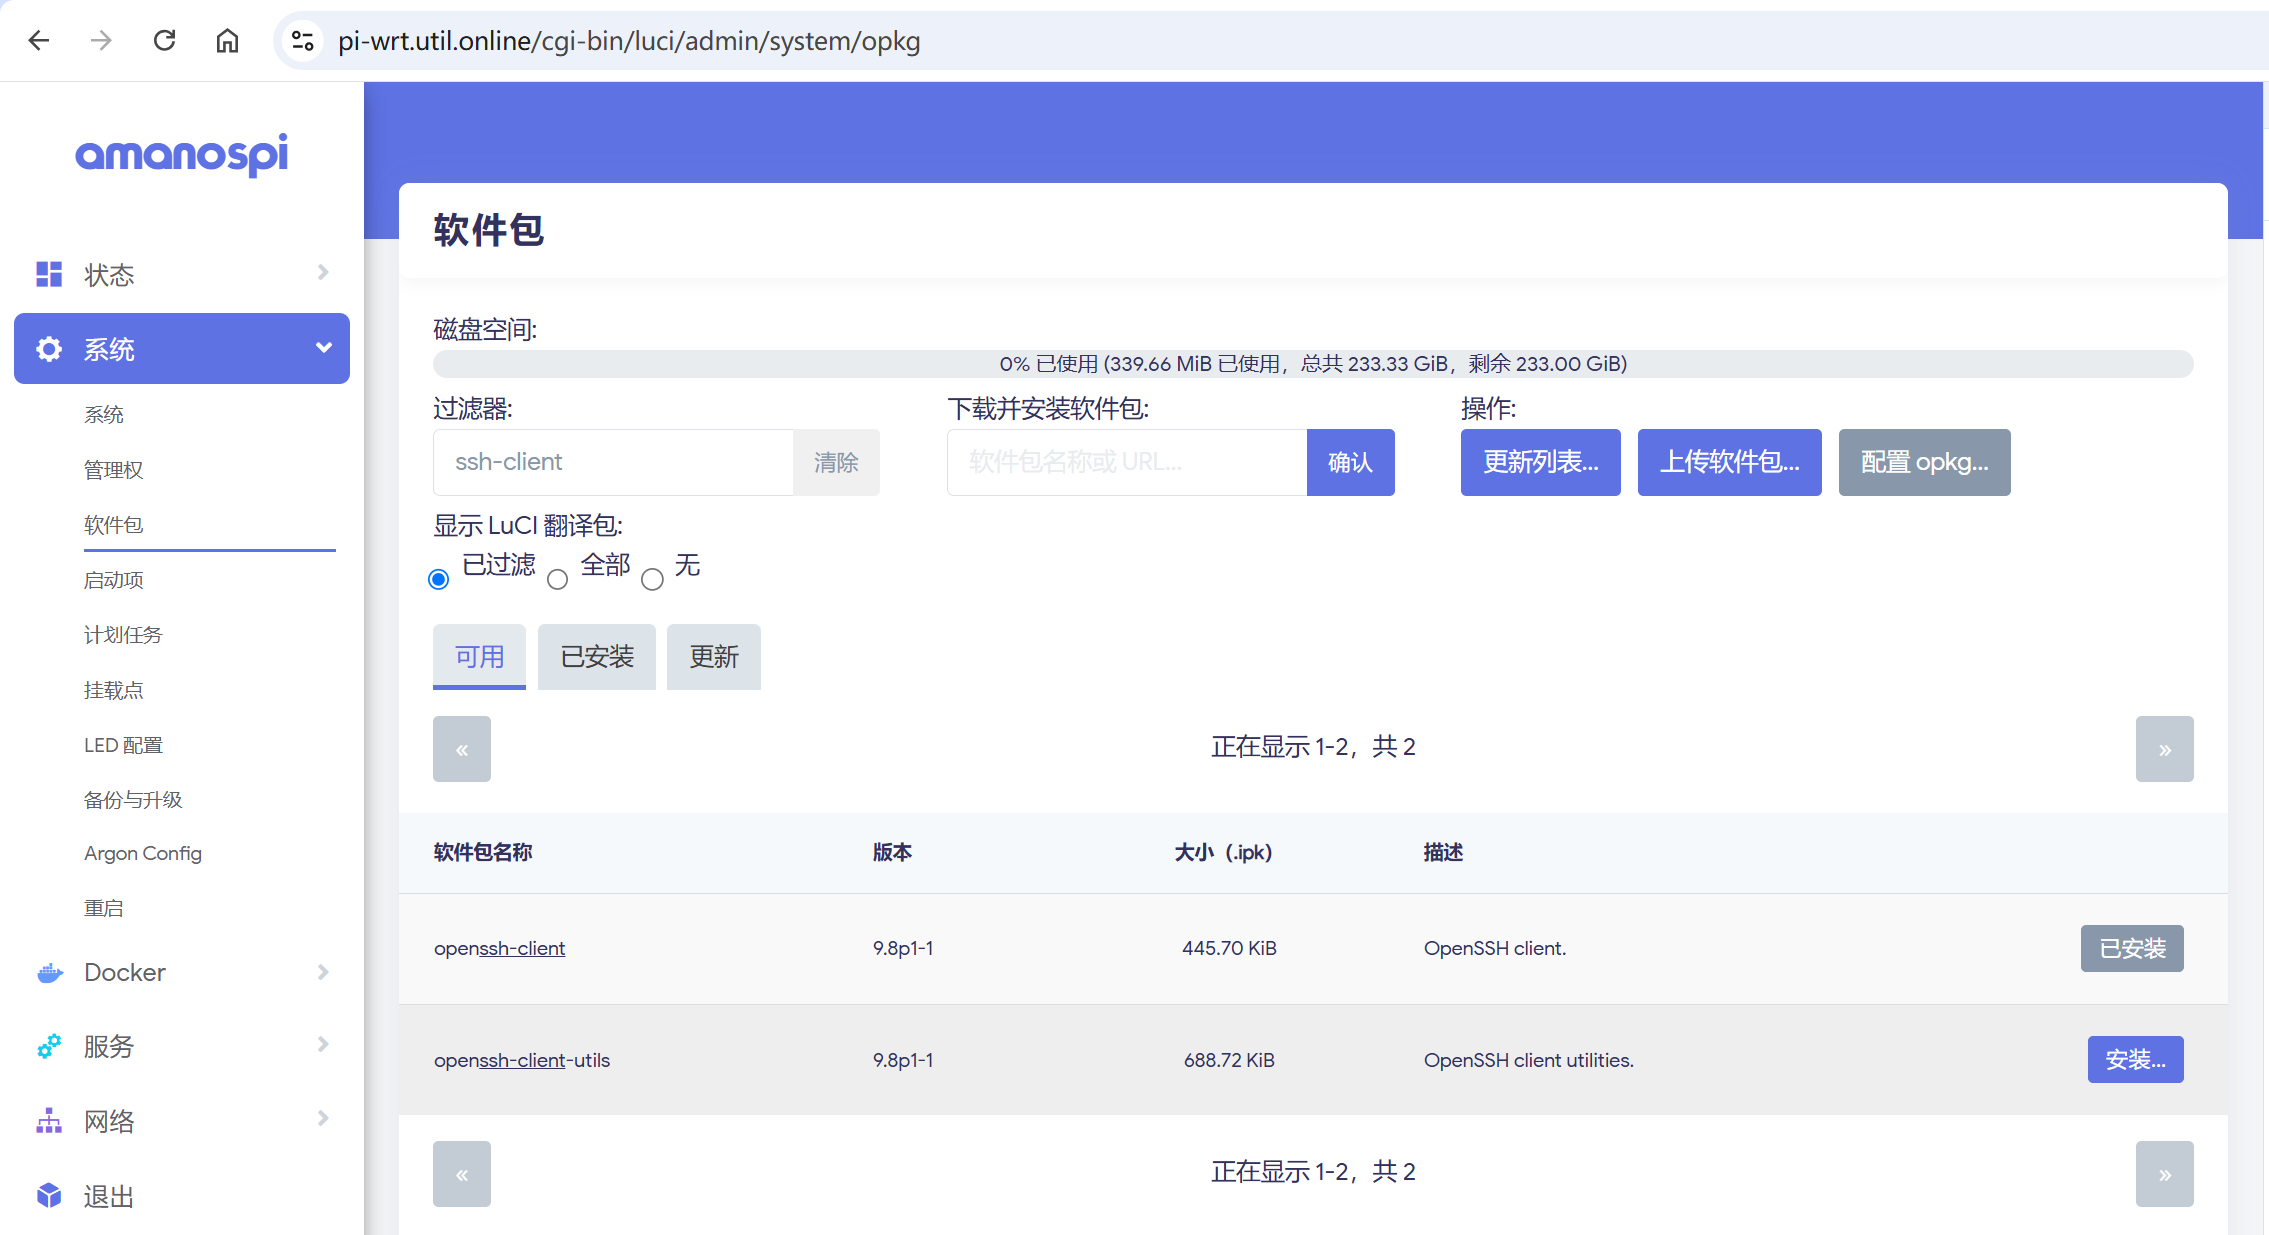
  1. 第一步安装openssh-client

  2. 检查可以发现ssh已经链接到openssh 了

    1
    2
    3
    4
    root@amanospi:~# which ssh
    /usr/bin/ssh
    root@amanospi:~# ls -al /usr/bin/ssh
    lrwxr-xr-x 1 root root 24 Jan 6 16:57 /usr/bin/ssh -> /usr/libexec/ssh-openssh
  3. 更新 ~/.ssh/config 文件, 增加下面的配置

    1
    2
    3
    Host github.com
    Hostname ssh.github.com
    Port 443

tspl打印图片

背景

上一篇文章聊了 nodejs 打印标签, 现在需要增加难度,把图片打印上去

解决方案

参考这篇文章, 作者已经实现了, 但是他的写法已经不支持最新的版本了, 我来翻新一下

新代码

1
2
3
4
5
6
7
8
9
10
11
12
13
14
15
16
17
18
19
20
21
22
23
24
25
26
27
28
29
30
31
32
33
34
35
36
37
38
39
40
41
42
43
44
45
46
47
48
49
50
51
52
53
54
55
56
57
58
59
60
61
62
63
64
65
66
67
68
69
70
71
72
73
74
75
76
77
78
79
80
81
82
83
84
85
86
87
88
89
90
91
92
93
94
95
96
97
98
99
100
101
102
103
104
105
106
107
108
109
110
111
112
const usb = require('usb');
const { Jimp, intToRGBA } = require('jimp');
console.log('Jimp is ', Jimp);
const fs = require('fs')
let iconv = require('iconv-lite');

const json = JSON.parse(fs.readFileSync('logo.json', { encoding: 'utf-8' }))
const imgWidthInBytes = json[0].length;
const imgHeightInDots = json.length;


const cmds = [
'SIZE 48 mm, 10 mm',
'CLS',
'TEXT 1,1,"TSS24.BF2",0,1,1,"你好"',
'PRINT 1',
'END'
]
// const cmds = [
// 'SIZE 48 mm,25 mm',
// 'CLS',
// 'TEXT 10,10,"4",0,1,1,"HackerNoon"',
// 'TEXT 10,40,"4",0,1,1,"amano"',
// 'BARCODE 10,100,"128",90,1,0,2,2,"altospos.com"',
// 'PRINT 1',
// 'END',
// ];


async function getImageData(path) {
const img = await Jimp.read(path)
const bitmap = img.bitmap
const widthInBytes = Math.ceil(bitmap.width / 8);
const data = new Array(bitmap.height);
for (let y = 0; y < bitmap.height; y++) {
const row = new Array(widthInBytes);
for (let b = 0; b < widthInBytes; b++) {
let byte = 0;
let mask = 128;
for (let x = b * 8; x < (b + 1) * 8; x++) {
const color = intToRGBA(img.getPixelColor(x, y));
if (color.a < 65) byte = byte ^ mask;
mask = mask >> 1;
}
row[b] = byte;
}
data[y] = row;
}
return data;
}


function print(cmds) {
let device = usb.findByIds(1137, 85)

console.log('cmds is ', cmds);

device.open();
device.interfaces[0].claim();
const outEndpoint = device.interfaces[0].endpoints.find(e => e.direction === 'out');
outEndpoint.transferType = 2;

const processedCmds = cmds.map(cmd => {
if (cmd.startsWith('BITMAP')) {
return Buffer.from(cmd);
}
else if (cmd.startsWith('RAW ')) {
// 去掉 'HEX ' 前缀并将十六进制字符串转换为 Buffer
const jsonData = JSON.parse(cmd.slice(4).trim());
console.log('jsonData is ', jsonData);
return Buffer.from(jsonData.flat());
} else {
// 普通命令按原样处理
return iconv.encode(cmd + '\r\n', 'gbk');
}
});

outEndpoint.transfer(Buffer.concat(processedCmds), (err) => {
if (err) {
console.error('Transfer error:', err);
}
device.close();
})
}


const main = async () => {

const list = usb.getDeviceList()
list.forEach(device => {
console.log(`Device: ${device.deviceDescriptor.idVendor}:${device.deviceDescriptor.idProduct}`);
});


print(cmds)

};


async function generateImg() {

const res = await getImageData('logo-niumag.png')
console.log('res is ', res);
fs.writeFileSync('./logo.json', JSON.stringify(res))
}

// generateImg()
main()

老代码

1
2
3
4
5
6
7
8
9
10
11
12
13
14
15
16
17
18
19
20
21
22
23
24
25
26
27
28
29
30
31
32
33
34
35
36
37
38
39
40
41
42
43
44
45
46
47
48
49
50
51
52
53
const usb = require('usb');
const Jimp = require('jimp');

function getImageData(path, cb) {
Jimp.read(path, (err, img) => {
const widthInBytes = Math.ceil(img.getWidth() / 8);
const data = new Array(img.getHeight());
for (let y = 0; y < img.getHeight(); y++) {
const row = new Array(widthInBytes);
for (let b = 0; b < widthInBytes; b++) {
let byte = 0;
let mask = 128;
for (let x = b*8; x < (b+1)*8; x++) {
const color = Jimp.intToRGBA(img.getPixelColor(x, y));
if (color.a < 65) byte = byte ^ mask; // empty dot (1)
mask = mask >> 1;
}
row[b] = byte;
}
data[y] = row;
}
cb(data);
});
}

function print(buffer) {
// you can get all available devices with usb.getDeviceList()
let device = usb.findByIds(/*vid*/8137, /*pid*/8214);
device.open();
device.interfaces[0].claim();
const outEndpoint = device.interfaces[0].endpoints.find(e => e.direction === 'out');
outEndpoint.transferType = 2;
outEndpoint.transfer(buffer, (err) => {
device.close();
});
}

getImageData('hn-logo.png', (data) => {
const widthInBytes = data[0].length;
const heightInDots = data.length;

const buffer = Buffer.concat([
Buffer.from('SIZE 48 mm,25 mm\r\n'),
Buffer.from('CLS\r\n'),
Buffer.from(`BITMAP 10,20,${widthInBytes},${heightInDots},0,`),
Buffer.from(data.flat()),
Buffer.from('BARCODE 10,100,"128",50,1,0,2,2,"altospos.com"\r\n'),
Buffer.from('PRINT 1\r\n'),
Buffer.from('END\r\n'),
]);

print(buffer);
});

参考图片

1.
hn-logo.png

2.
logo-niumag.png

2024windows_powershell_乱码

背景

  1. 最近一些桌面端的项目启动的输出怎么乱码
  2. git 的一些操作也出现乱码

问题测试

可以复制这些到一个文件里面, 然后直接在powershell 里面执行

1
2
3
@echo off
echo test chinese character view 测试中文字符显示
pause

解决方案

方案1

  1. windows上我通过 chcp 65001 && npm run start 可以解决

方案2

  1. 参考这个 文章, 第一步查看powershell 配置位置
1
$PROFILE
  1. 在该配置文件中添加如下配置:
1
$OutputEncoding = [console]::InputEncoding = [console]::OutputEncoding = New-Object System.Text.UTF8Encoding
  1. 验证
1
./test.bat

2024docker使用代理

背景

和上一篇文章类似,墙内世界自己推送了image之后, 服务器(我的环境是centos)上拉取也得使用代理。
但是最近很多伙伴反馈只简单的更新环境变量没有效果,通过文档上面更新docker daemon.json 也没有效果

解决

还是参考官方文档, 使用 systemd unit file

  1. Create a systemd drop-in directory for the docker service:
1
sudo mkdir -p /etc/systemd/system/docker.service.d
  1. Create a file named /etc/systemd/system/docker.service.d/http-proxy.conf that adds the HTTP_PROXY environment variable:
1
2
3
4
5
[Service]
Environment="HTTP_PROXY=http://127.0.0.1:7890"
Environment="HTTPS_PROXY=http://127.0.0.1:7890"
Environment="NO_PROXY=localhost,127.0.0.1,docker-registry.example.com,.corp"

  1. Flush changes and restart Docker
1
2
sudo systemctl daemon-reload
sudo systemctl restart docker
  1. Verify that the configuration has been loaded and matches the changes you made, for example:
1
2
3
sudo systemctl show --property=Environment docker

Environment=HTTP_PROXY=http://127.0.0.1:7890 HTTPS_PROXY=http://127.0.0.1:7890 NO_PROXY=localhost,127.0.0.1,docker-registry.example.com,.corp

注意

我偷懒只写了http_proxy, 结果发现没有效果, 请一定不能省略https_proxy

2024安装clash

背景

https://github.com/Dreamacro/clash 因为晒车牌被抓住了,很多脚本都失效了,这里提供一个解决方案

方式

  1. 下载
1
2
3
wget https://archlinux.org/packages/extra/x86_64/clash/download
mv download clash.tar
tar -xvf clash.tar
  1. 运行
1
2
3
clash ./usr/bin/clash
# INFO[0000] Can't find MMDB, start download
# FATA[0000] Initial configuration directory error: can't initial MMDB: can't download MMDB: Get "https://cdn.jsdelivr.net/gh/Dreamacro/maxmind-geoip@release/Country.mmdb": read tcp 172.24.35.37:39168->8.7.198.46:443: read: connection reset by peer
  1. [可选]补充

如果第一步 archlinux 下载不了, 可以手动下载安装包, 然后 scp 到服务器上
如果第二步 Country.mmdb 下载不了, 可以手动下载, 然后 scp 到服务器的 ~/.config/clash 文件夹

  1. 更新配置

默认的配置文件是 ~/.config/clash 这里, 参考我的

1
2
3
4
➜  clash pwd
/root/.config/clash
➜ clash ls
cache.db config.yaml config.yaml.bak Country.mmdb
  1. 类unix命令行使用
1
export https_proxy=http://127.0.0.1:7890;export http_proxy=http://127.0.0.1:7890;export all_proxy=socks5://127.0.0.1:7890

containerd常见命令

背景

自docker hub以及各种源被墙之后, 阿里云的ack服务就拉取不到docker镜像啦, ack服务底层又是使用containerd, 所以手动使用docker 命令拉取镜像也不可以,需要使用 containerd 对应的命令, 比如 crictl.

但是 crictl 不支持 http_proxy, 所以使用 ctr

1
2
3
4
5
6
7
8
9
10
11
12
# 使用代理
export https_proxy=http://127.0.0.1:7890;export http_proxy=http://127.0.0.1:7890;export all_proxy=socks5://127.0.0.1:7890

# 查看命名空间
ctr namespaces list

# 查看镜像列表
ctr -n k8s.io images list

# 拉取获取推送
ctr -n k8s.io images pull -u username:pass registry.niumag.com/namespace/image:snap
ctr -n k8s.io images push -u username:pass registry.niumag.com/namespace/image:snap

nodejs 打印标签

背景

公司有需求, 打印一些小票

  1. 直接搜索 node-printer 或者 node-thermal-printer 都太古老了。
  2. windows 自带的打印命令 不好调试
  3. 这里分享下使用 TSPL指令条码打印机 的一些解决方案

TSPL

示例

1
2
3
4
5
SIZE 60 mm,40 mm\r\n
GAP 2 mm\r\n
CLS\r\n
TEXT 50,50,\"4\",0,1,1,\"DEMO FOR TEXT\"\r\n
PRINT 1,1\r\n

文档

https://open.jolimark.com/files/tspl.pdf

步骤

  1. 找到设备端口
1
2
3
4
5
6
const usb = require('usb');

const list = usb.getDeviceList()
list.forEach(device => {
console.log(`Device: ${device.deviceDescriptor.idVendor}:${device.deviceDescriptor.idProduct}`);
});
  1. 连接设备
1
2
3
4
5
6
7
8
9
10
let device = usb.findByIds(1137, 85)
console.log('device is ', device);

device.open();
device.interfaces[0].claim();
const outEndpoint = device.interfaces[0].endpoints.find(e => e.direction === 'out');
outEndpoint.transferType = 2;
outEndpoint.transfer(Buffer.from(cmds.join('\r\n')), (err) => {
device.close();
});
  1. [选填] windows 需要刷新设备的驱动,可以参考 usb 的文档

    On Windows, if you get LIBUSB_ERROR_NOT_SUPPORTED when attempting to open your device, it’s possible your device doesn’t have a WinUSB driver for libusb to use.

    You can install one using Zadig or another approach is to use the UsbDK Backend of libusb by immediately calling usb.useUsbDkBackend().

    Note that you cannot use multiple drivers on Windows as they get exclusive access to the device. So if you want to switch between drivers (e.g. using a printer with this software or the system), you will need to uninstall/install drivers as required.

    For further info, check How to use libusb on Windows in the libusb’s wiki.

刷后的效果 如图

完整代码

1
2
3
4
5
6
7
8
9
10
11
12
13
14
15
16
17
18
19
20
21
22
23
24
25
26
27
28
29
const usb = require('usb');

const cmds = [
'SIZE 48 mm,25 mm',
'CLS',
'TEXT 10,10,"4",0,1,1,"HackerNoon"',
'TEXT 10,40,"4",0,1,1,"amano"',
'BARCODE 10,100,"128",90,1,0,2,2,"altospos.com"',
'PRINT 1',
'END',
];

// you can get all available devices with usb.getDeviceList()
const list = usb.getDeviceList()
console.log('list is ', list);
list.forEach(device => {
console.log(`Device: ${device.deviceDescriptor.idVendor}:${device.deviceDescriptor.idProduct}`);
});
// let device = list[0]
let device = usb.findByIds(1137, 85)
console.log('device is ', device);

device.open();
device.interfaces[0].claim();
const outEndpoint = device.interfaces[0].endpoints.find(e => e.direction === 'out');
outEndpoint.transferType = 2;
outEndpoint.transfer(Buffer.from(cmds.join('\r\n')), (err) => {
device.close();
});

centos 安装 mysqlclient 报错

问题

  1. 使用django的框架时, 发现服务端安装 mysqlclient 报错
  2. 使用 mysql-connector-python 代替 mysqlclient, 但会发现 USE_TZ 相关的配置不支持,导致数据的时间变成UTC格式,直观上有时差

解决 TL;DR

切换sql-connector-python会导致上面的问题2,所以直接降级 mysqlclient 就好

1
pip install mysqlclient==2.0.0

博客历程

心路历程

初心是买一个软路由的硬件设备, 最终选了 r2s, r2s内置的是Openwrt 的系统,但是有些预装软件不全面, 就自己刷了系统, 不小心刷盘的时候把树莓派的移动硬盘刷掉了 /(ㄒoㄒ)/~~, 最终只能重新搭建博客啦~

选型历程

之前的博客是ghost, 类似于wordpress, 好处是有一个online的后台管理, 可以方便的记录博客。
hexo 的文件可以存在在git中, 就是写作方式没有那么随意了,图片的防止也没有那么方便, 但是苛刻的书写环境,也能让内心更加平静, 也算是一种不错的体验。

技术栈

  1. 项目存储在github中
  2. 服务运行在wrt中(实际是局域网内部的pi中)
  3. 网络通过frp转发到aliyun的含公网的服务器,服务器运行了traefix, 自动授权证书等一些网关功能
  4. 推送代码后, github 的webhook 会通知wrt 的webhook, 继而更新wrt中的服务
  5. 服务的开机自启动通过 sudo update-rc.d -n startblog.sh defaults 实现,脚本参考(默认有热更新功能)
1
2
3
4
pi@amanospi:/etc/init.d $ cat startblob.sh

cd /home/pi/amano/amanosblog
npx hexo server &

补充

  1. 本片文章的时间调整成了hello world 的时间, 然后就要删除自带的hello world 啦
  2. 硬件本身只和耳机一样大小